Homemade Waffle Cones Recipe
Homemade Waffle Cones are a special treat to pair with your favorite ice cream flavors and more! Get ready to make some wonderful ice cream cones using your own cones just like the ones they have at ice cream shops.

If you go to an ice cream store, you typically have a choice between getting a waffle cone and a sugar cone; the sugar cones are mass produced and waffle cones are larger, softer ones generally made in-house.
But, the way I see it, any ice cream cone made on a waffle iron is a waffle cone.
This cone recipe ends up nice and crispy and sweet – more like what you typically hear called a sugar cone, but way better!
What Special Equipment Do You Need to Make Homemade Waffle Cones?
First, and this is really important, waffle ice cream cones are NOT made on regular waffle irons.
The kind of waffle iron that you use to make normal waffles has ridges that are way too deep for an ice cream cone.
To make ice cream cones you’ll need to purchase a waffle cone maker [paid link].
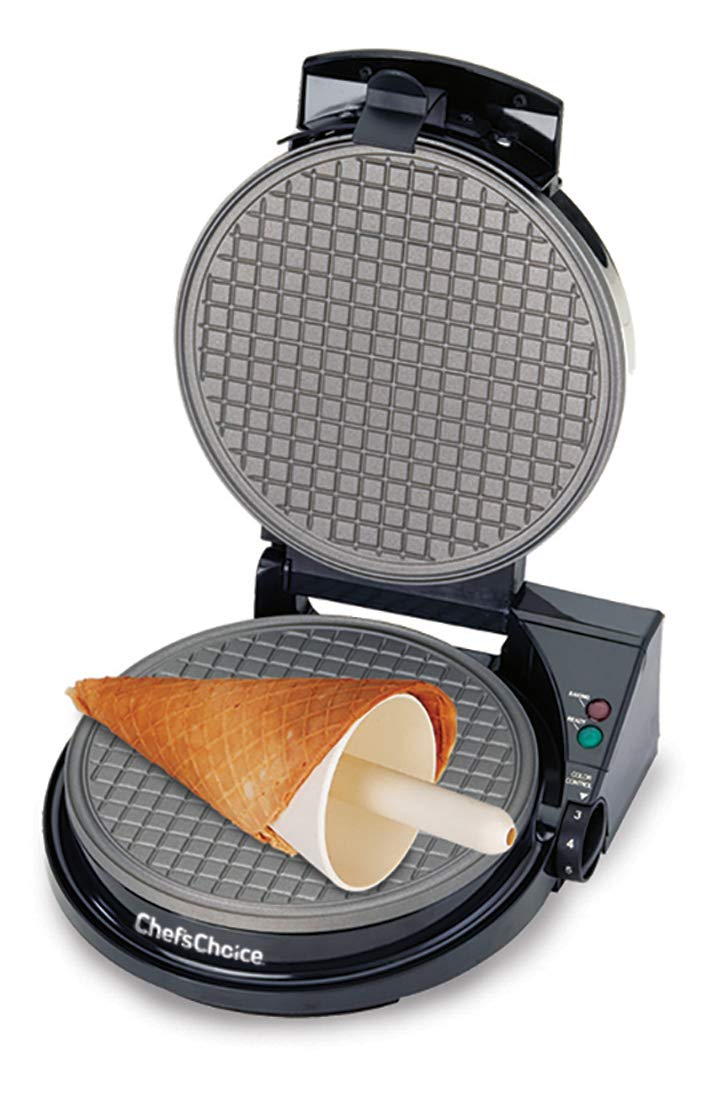
Your waffle cone maker should come with a cone-shaped mold. This mold is a very important tool for shaping your waffle cones.
Can You Make A Waffle Cone Without a Waffle Cone Maker?
If you don’t have a waffle cone maker, you can make waffle cones in a pizzelle maker or on a panini press. You’ll need to create your own mold from some thick paper or cardboard like a file folder.
How to Make a Homemade Waffle Cone

- In a bowl with a whisk, whip heavy whipping cream with vanilla until mousse-like (it won’t form peaks).
- Sift powdered sugar, flour, and cornstarch together and stir them into the cream to make a batter.
- Let the batter sit for 30 minutes.
- Follow the instructions that come with your waffle cone maker to cook the batter.
How to Shape a Waffle Cone
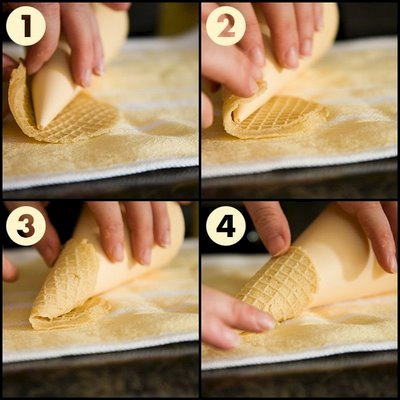
The waffle cone maker comes with a cone-shaped mold to roll the waffle around. Here are a couple of rolling tips:
- Work fast. The waffles harden super quickly.
- Protect your hands. The waffle will be really hot and you could burn yourself. You might want to use a towel or wear gloves to help you roll.
- As soon as the cone begins to overlap itself, press down firmly as you continue to roll to make it stick closed. It also helps to hold the waffle in the position shown in step four for a few seconds.
- Use your fingers to pinch together the hole at the bottom of the cone.
How to Store Homemade Ice Cream Cones

Store the cooled waffle cones in an airtight container until you are ready to fill them with ice cream or whatever else your mind dreams up.
Tip: Adding a stale piece of bread to the container will help keep the cones crispy for several days. The bread will absorb any moisture.
Waffle Cone Variations
One of the great things about making waffle cones from scratch is that you can experiment with different flavors.
Some ideas are:
- Spicing the batter with cinnamon and nutmeg
- Black Waffle Cones made from activated charcoal
- Chocolate Waffle Cones
Unique Uses for Homemade Waffle Ice Cream Cones

That’s not ice cream in the waffle cone; it’s edible cookie dough! Cookie dough lovers will go crazy for cookie dough-filled waffle cones!
You can also fill homemade waffle cones with fruit and chantilly cream, or with any kind of frosting.
You can even bake cupcakes in ice cream cones using an ice cream cone rack [paid link].

What About Waffle Bowls?
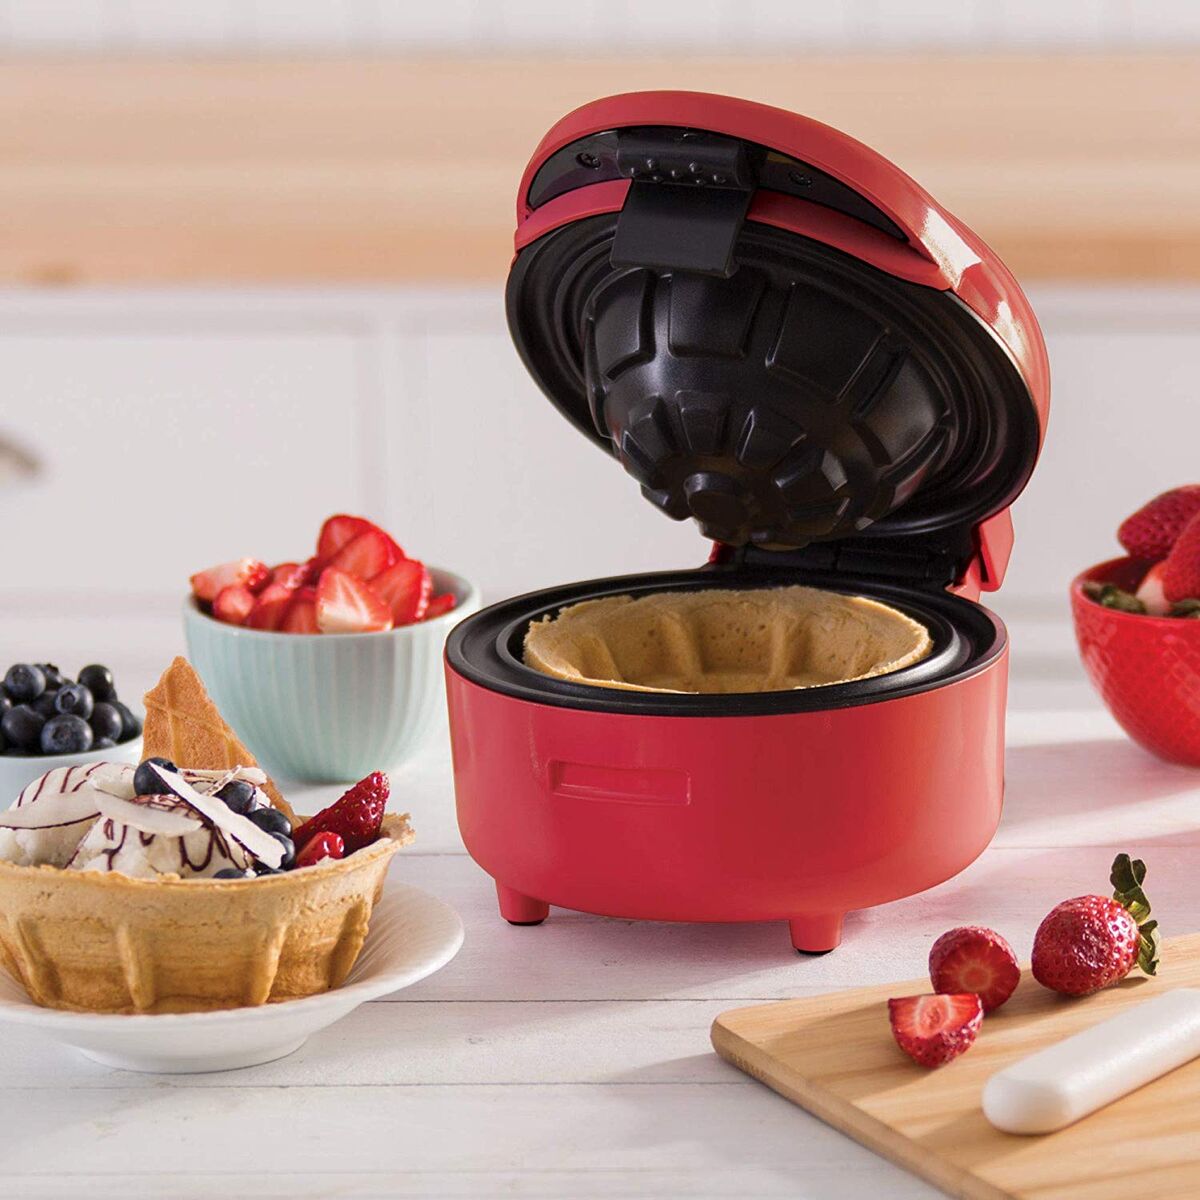
Waffle bowls have their very own waffle bowl maker [paid link]. It’s one more gadget to own, but it’s so fun!
Homemade Waffle Cone FAQs
One major trick is to allow the cones plenty of time to cool once they’re rolled. Especially if you’re storing them away, any excess heat will naturally create steam that will soften the cones. Roll them and allow them to fully cool. Also be sure you’re cooking them enough.
The difference is in the process of creation. A sugar cone is typically a more mass-produced product that has a flat brim on top. A waffle cone on the other hand is hand-made and hand-rolled and has an uneven top. Sugar cones can be ideal for slow ice cream eaters, as they tend to stay crisper for longer.
Again, I don’t recommend using a regular waffle maker over a specific waffle cone maker. The ridges in a typical waffle maker will be much too deep to produce the proper kind of waffle ice cream cone.
Waffle Cone Recipe
Ingredients
- 1 cup heavy cream
- 1 1/2 teaspoons vanilla extract
- 1 1/2 cups powdered sugar
- 1 1/2 cups all-purpose flour
- 1 tablespoon cornstarch
Instructions
- In a bowl with a whisk, whip the heavy cream with the vanilla extract until mousse-like (it won't form peaks).
- Sift the remaining ingredients together and stir them into the cream to make a batter.
- Let the batter sit for 30 minutes.
- Follow the manufacturer's instructions to heat up the waffle cone maker and to cook the batter. I suggest over-baking the waffle cones just slightly. Whenever I got scared of the cones burning and pulled them off of the iron, they ended up a little soggy.
- To shape the waffles, roll the hot waffle around the cone mold that comes with the waffle maker. As soon as the cone begins to overlap itself, press down firmly as you continue to roll to make it stick closed. Use your fingers to pinch together the hole at the bottom of the cone. Work quickly as the the waffles harden very fast and you don't want to miss your window. Also, protect your hands; the waffle will be really hot and you could burn yourself. You might want to use a towel or wear gloves to help you roll the flat waffles into cones.

Loading comments...